
This guide explains how to add your own domain email account, created with aWh, to the new Outlook for Windows app using IMAP. The new Outlook is the free, built-in email program in Windows 11 and is also available as an option with a Microsoft 365 subscription. IMAP keeps your emails on the server, so you’ll see the same mailbox on your phone and in webmail.
We tested the steps in November 2026 on Windows 11 (26H2), with version 1.2026.1013 of the new Outlook and version 2610 of the Microsoft 365 classic Outlook, using one cPanel hosting and one web hosting test mailbox.
Support for Outlook 2016, 2019 and 2021 has ended, so they no longer receive security updates (the article on the Outlook version lists the dates). The supported desktop versions of Outlook are now the Outlook of a Microsoft 365 subscription and Outlook 2024: these are the classic Outlook, and you can read how to set it up at the end of this article.
Video: Setting up an IMAP mailbox in the new Outlook for Windows (cPanel hosting and web hosting) (silent screen recording with Hungarian captions)Servers and ports
| Incoming (IMAP) | Outgoing (SMTP) | |
|---|---|---|
| Server, cPanel hosting | mail.<your domain> |
mail.<your domain> |
| Server, web hosting | the name of the hosting server (for example, k02.awh.hu) |
the same |
| Port | 993 | 465 |
| Type of secure connection | SSL/TLS | SSL/TLS |
| Username | the full email address | the full email address |
The guide on configuring Thunderbird shows you where to find the correct details on the two control panels. For web hosting, use the server name, not the mail.<your domain> address: the mail server’s certificate is issued in the name of the server.
Adding your first email account
-
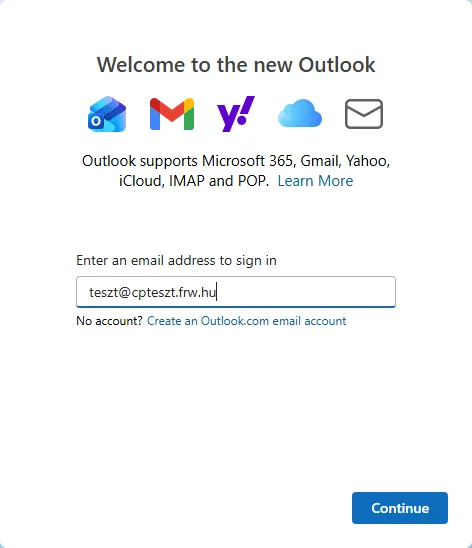
Launch the Outlook app. If you do not have an account set up yet, the Welcome to the new Outlook window appears. Enter your full email address and click Continue.
-
Outlook recognises that this is an IMAP account and asks for the password. Before you type it, turn on the Show more toggle: this shows you which servers Outlook suggests (Use recommended settings).
On cPanel hosting the suggestion was correct: IMAP Incoming server is
mail.<domain>, Port is 993 and Secure connection type is SSL / TLS (recommended).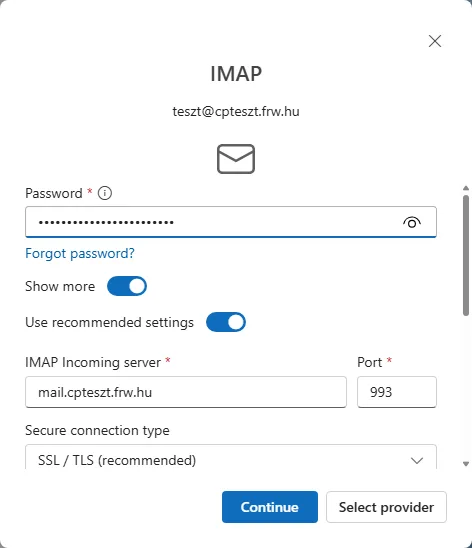
-
Scroll down. SMTP username is your full email address; you can leave the SMTP password field blank (Outlook then uses the password above); on cPanel hosting the SMTP Outgoing server is also
mail.<domain>, on port 465, with SSL / TLS (recommended). If everything matches the table, click Continue.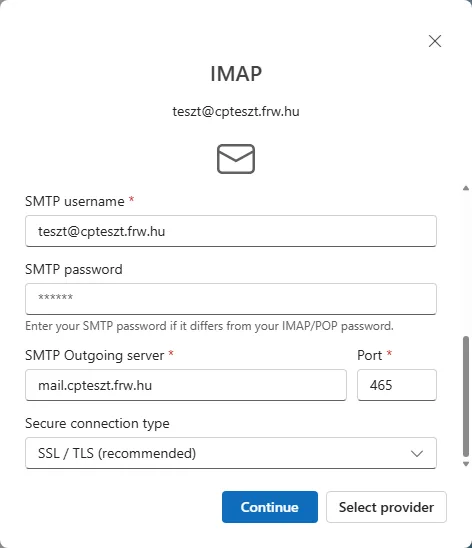
-
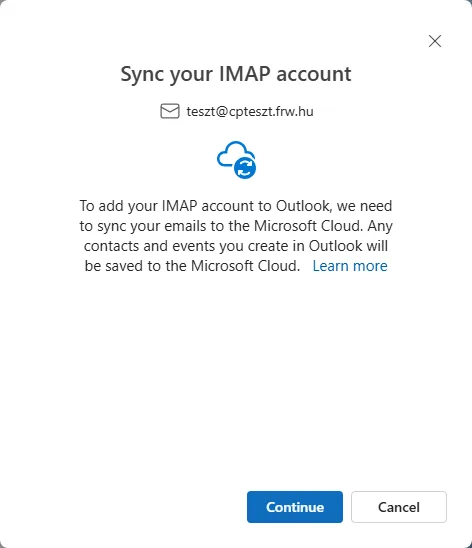
The Sync your IMAP account window tells you that the new Outlook handles non-Microsoft mailboxes through the Microsoft cloud: Microsoft’s servers download your emails from your mailbox, and the emails you send also leave from there (in our test, the header of the outgoing email showed the Microsoft server before our own mail server). If you accept this, click Continue; if not, use a different email client (see the end of the article).
-
After the first account, Outlook opens the mailbox straight away. If you add another account later, a Success! message appears at the end (see below).
When you first start Outlook, it asks a few more questions: about sending optional diagnostic data (We’re better together), about connected services, about data processing by Microsoft’s advertising partners (Reject all or Accept all) and about the layout of the ads. These do not affect how your mailbox works; the free new Outlook also shows ads in the message list (marked Ad).
Web hosting email accounts: servers must be entered manually
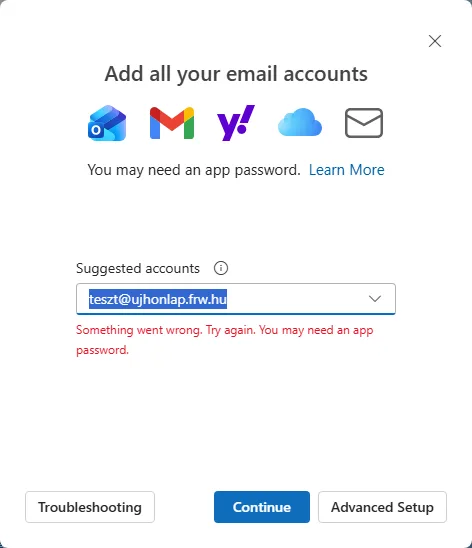
For web hosting mailboxes, Outlook suggested the right incoming server but the wrong outgoing one: the domain name for incoming mail, and for outgoing mail an address starting with smtp. on port 587, which the server’s certificate does not cover. Signing in with these settings failed (Something went wrong. Try again. You may need an app password.), so you need to enter the servers manually:
-
At the bottom of the folder list, click Add account (or, for your first account, follow step 1 above), enter your email address and click Continue.
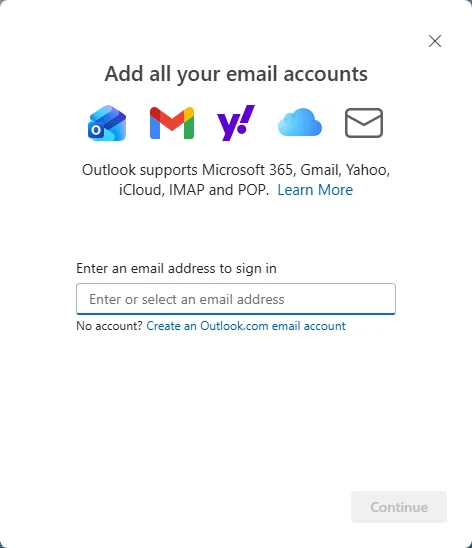
-
Turn on the Show more toggle. The suggested incoming server is the domain name (
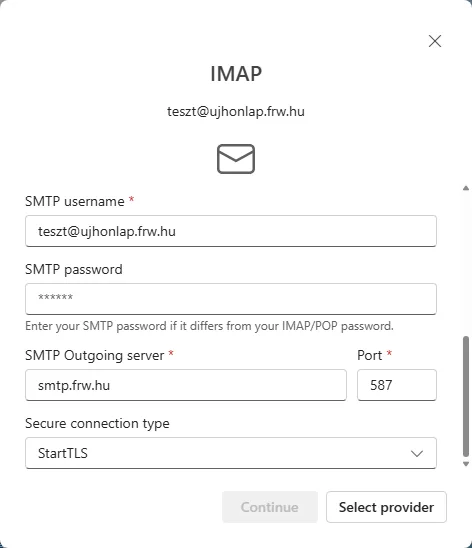
ujhonlap.frw.huin the image), while further down the outgoing server issmtp.frw.hu, port 587, StartTLS. The latter cannot be used, so in the steps below we replace both with the name of the hosting server.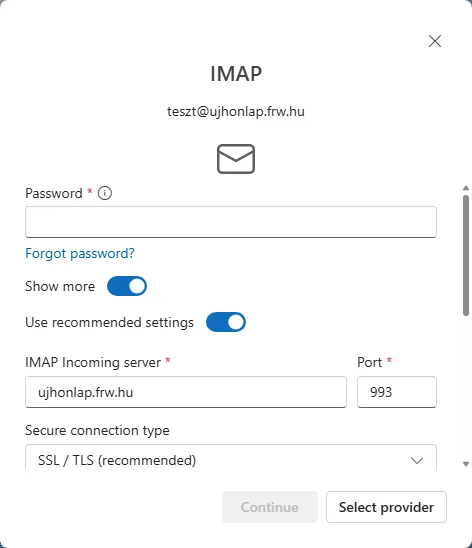
-
Type your password, then turn off the Use recommended settings toggle. In the IMAP Incoming server field, enter the name of the hosting server (
k02.awh.huin the image); the port is 993 and the connection type SSL / TLS (recommended).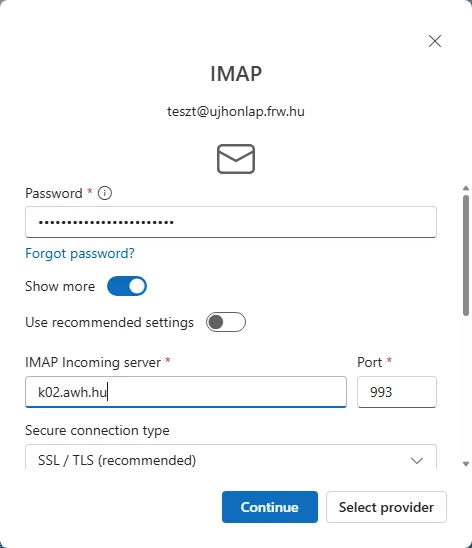
-
Scroll down: SMTP Outgoing server is the same server name, Port 465, Secure connection type SSL / TLS (recommended) (choose this in the list instead of StartTLS). Click Continue.
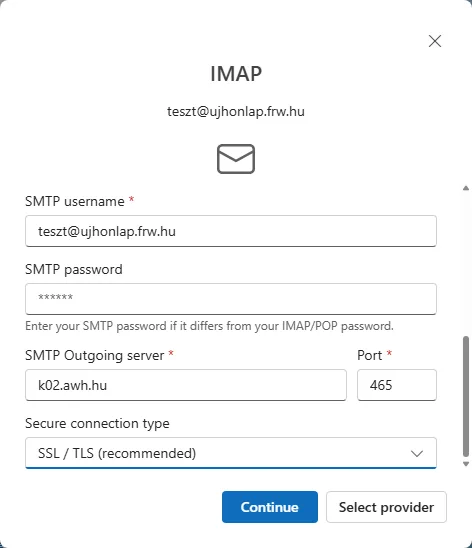
-
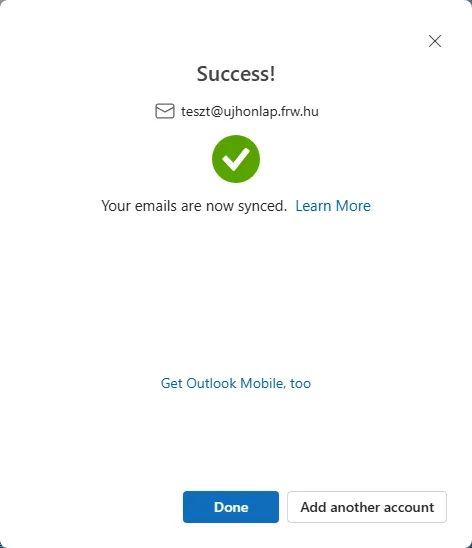
In the window about syncing, click Continue. At the Success! message, Done closes the window, and Add another account lets you set up another mailbox. In our test, an email sent from the account set up this way arrived, and its copy was saved in the Sent folder on the server.
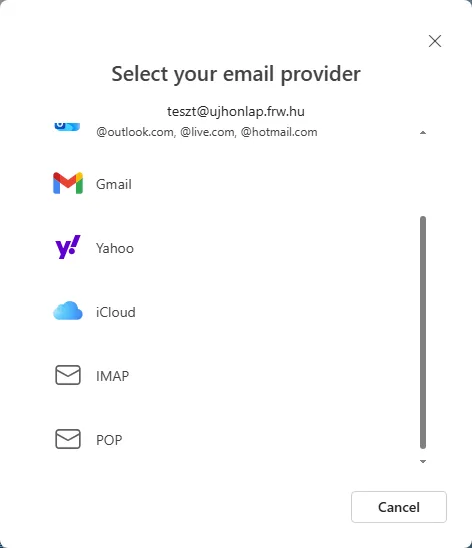
If signing in fails, Outlook goes back to the start window. Here the Advanced Setup button lets you choose the account type directly: scroll down and click IMAP; the same form as above then appears.
After configuration
Both mailboxes appear in the folder list on the left, and under All Accounts you can also see their emails in a combined view.
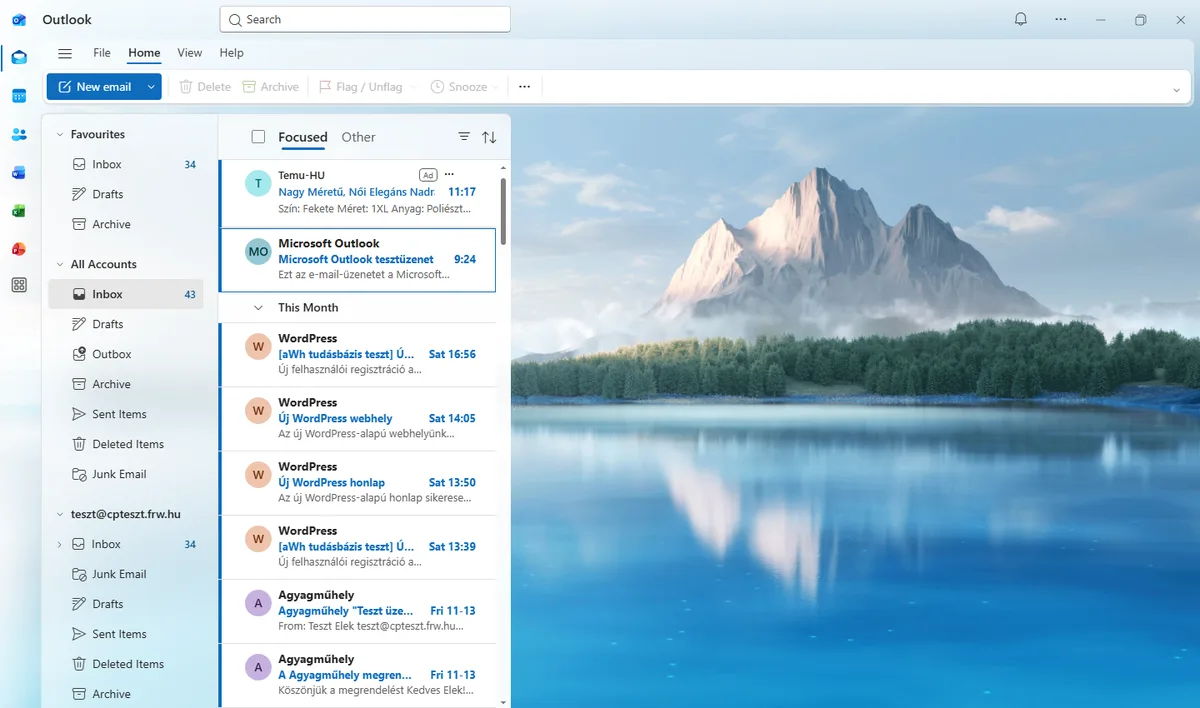
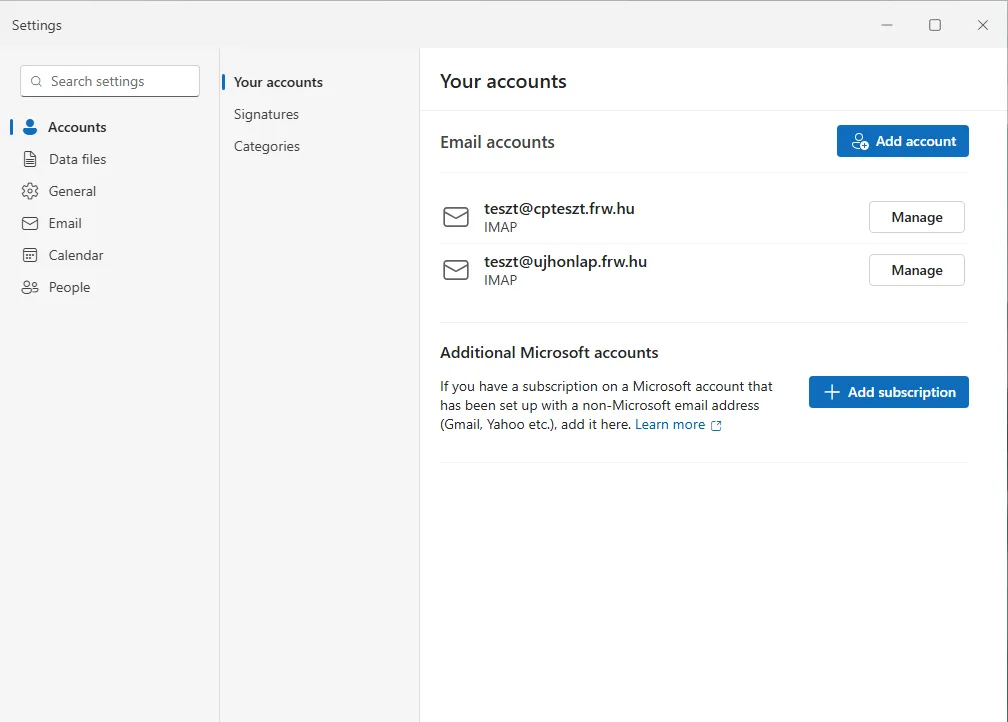
You can manage your accounts on the … > Settings > Accounts page in the top right-hand corner (Your accounts). The Manage button next to an account opens the Account details page, where the server settings are read-only.
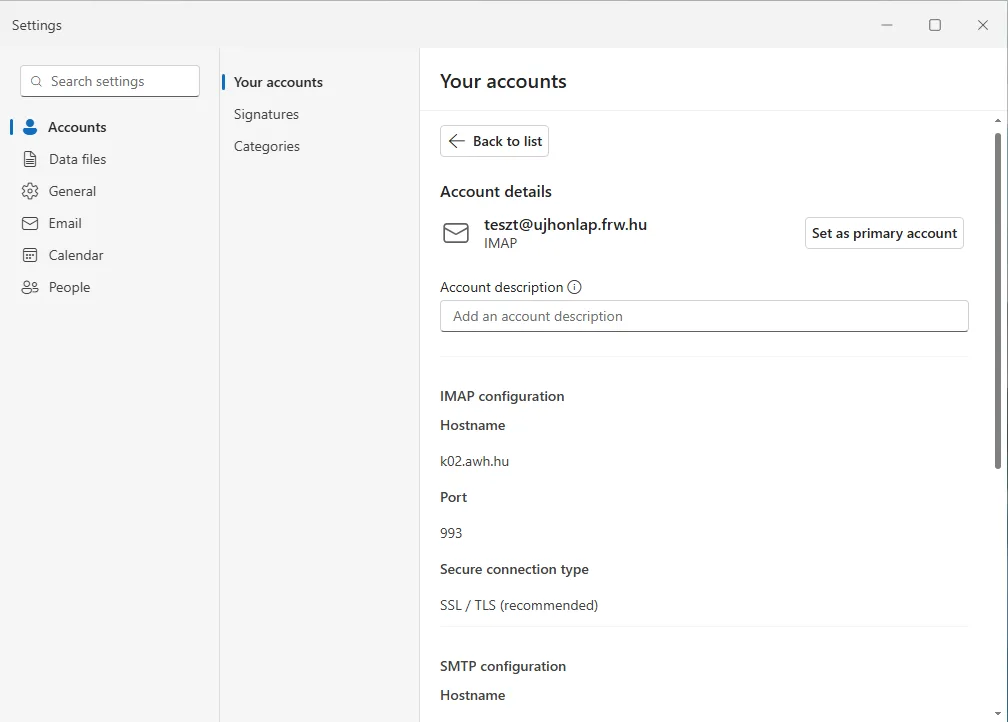
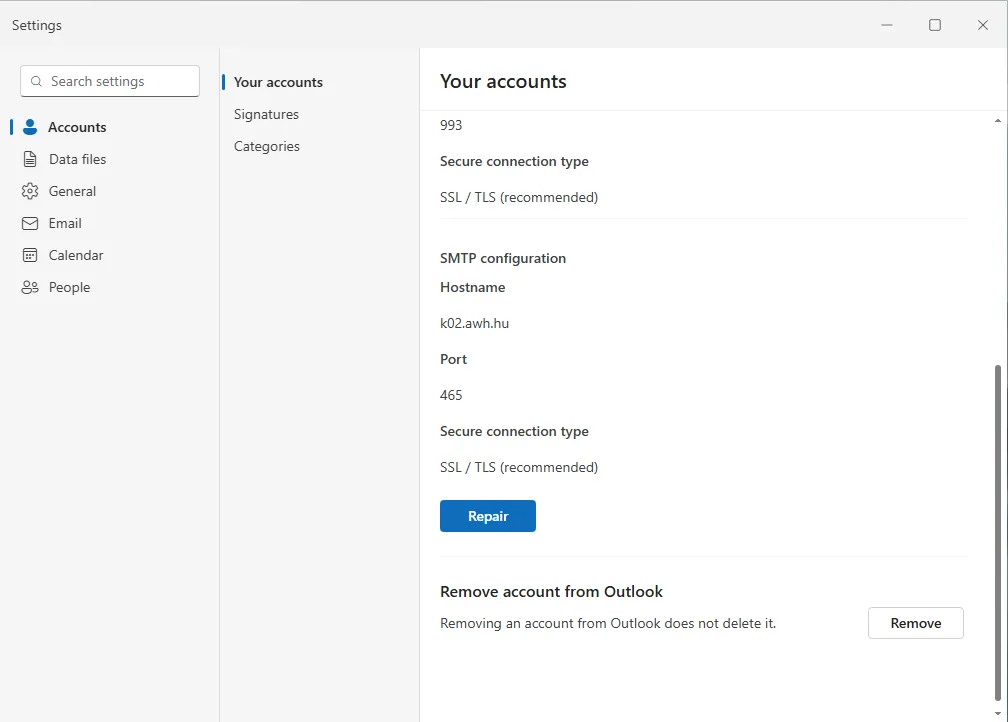
- Changing the server or password: the Repair button at the bottom of the page reopens the sign-in window (in our test with the password field and the server settings); after changing your password, enter the new one here.
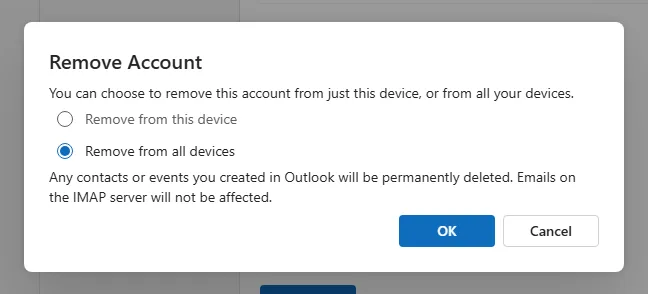
- Removing an account: use the Remove button. You can choose to remove it from this device only or from all your devices; contacts and events created in Outlook are deleted, but the emails on the server are not affected.
Classic Outlook (Microsoft 365, Outlook 2024)
The classic Outlook connects to the mail server directly, not through the Microsoft cloud. We tested the steps with the Microsoft 365 classic Outlook; Outlook 2024 shows the same windows.
- Click the File tab, then the Add Account button on the Account Information page.
-
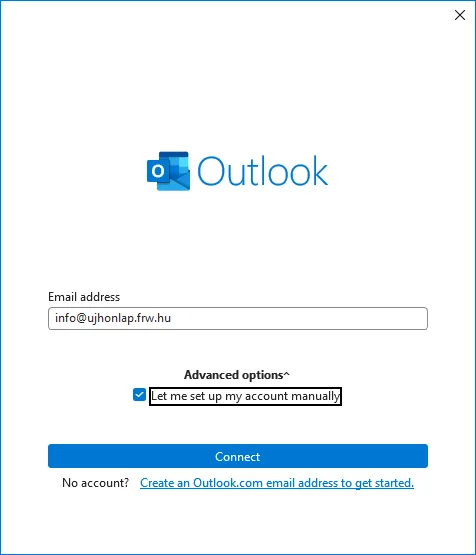
Enter your email address, click Advanced options, tick Let me set up my account manually, then click Connect.
- On the Advanced setup page, choose the IMAP account type, enter your password and click Connect.
-
On cPanel hosting, Outlook found the correct servers by itself (
mail.<your domain>, ports 993 and 465, SSL/TLS) and went straight to the Account successfully added page.On web hosting, Outlook connects to the wrong server and an Internet Security Warning appears (The target principal name is incorrect): click No. On the Something went wrong page, choose Change Account Settings. Enter the name of the hosting server (
k02.awh.huin the screenshot) in the Server field of both Incoming mail and Outgoing mail; the port is 993 and 465 respectively, and the Encryption method is SSL/TLS for both. Leave the Require logon using Secure Password Authentication (SPA) boxes unticked. Click Next, then Connect under the password.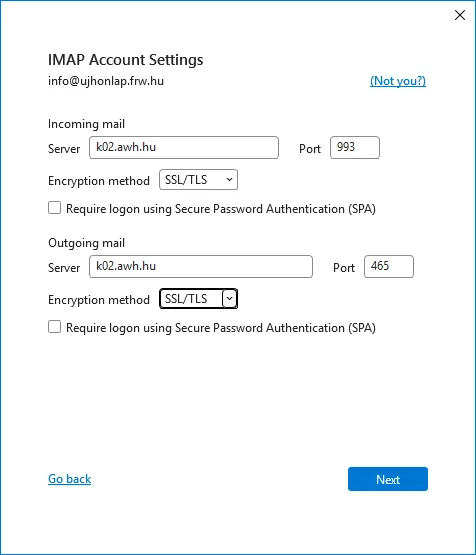
Instead of the warning, Outlook may also ask whether to allow a website (
k02.awh.hu) to configure the server settings. This does not create a working account either: after the error page, choose the IMAP account type again, and the same form appears. -
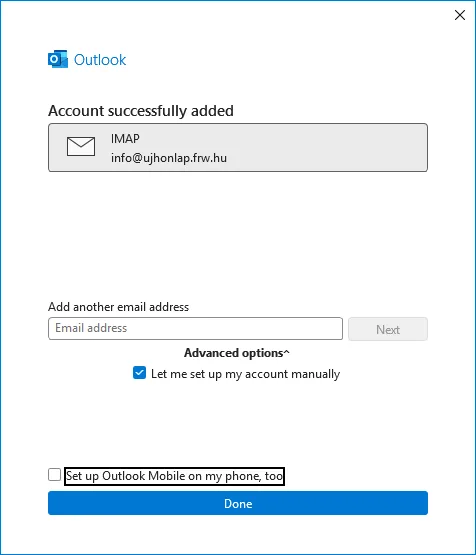
On the Account successfully added page, untick Set up Outlook Mobile on my phone, too if you don’t need it, and click Done. Outlook then sends a test message to the mailbox; in our test it arrived for both accounts.
You can change the servers later under File › Account Settings › Server Settings.
If it isn’t working
- The program is reporting a certificate error: the server name does not match the one on the certificate; the article on certificate errors in email clients will help you choose the correct name.
- “Something went wrong”, “You may need an app password”: our mailboxes do not need an app password. Check the servers and ports against the table; on web hosting, turn off the recommended settings.
- An incorrect password is indicated: please try logging into webmail using the same details; if that does not work either, change your password via the hosting control panel.
If you do not want your emails to be synced through the Microsoft cloud, use the classic Outlook or another email client, such as Thunderbird. On a Mac, the guide on setting up Apple Mail helps. We have a separate article on choosing between POP and IMAP.
