
On web hosting, the easiest way to install WordPress is with the application installer in KeyHelp’s Applications menu item, in a few clicks (see: KeyHelp control panel: getting started). This article describes the manual installation: for when you are curious about what happens behind the scenes, want to install with custom settings, or are bringing over the files of an existing site. For cPanel hosting, the steps are described in the article Manual installation of WordPress on cPanel hosting.
The installation has four parts: you download WordPress, create the database, upload the files to the domain’s folder, and finally run the WordPress installer in your browser.
1. Downloading WordPress
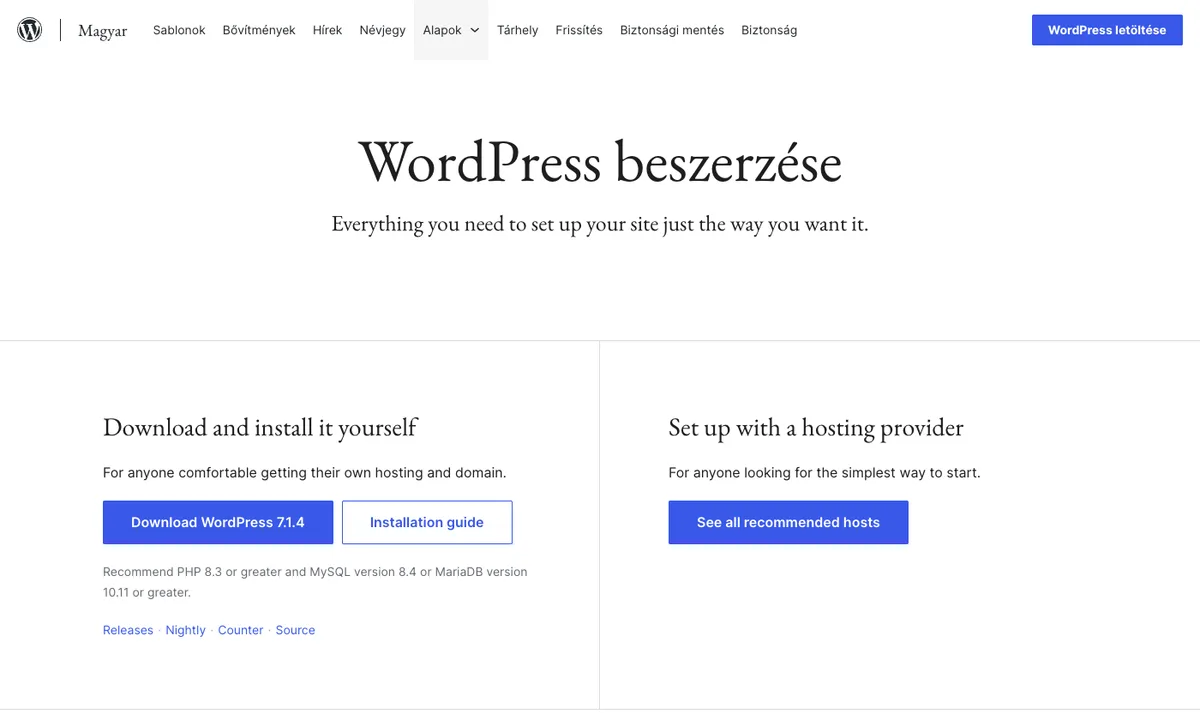
Open the wordpress.org/download page (Get WordPress) and click the Download WordPress button (the button shows the number of the latest version, for example 7.1.4). Your browser downloads a ZIP file, named for example wordpress-7.1.4.zip. This is the core package; the installer asks for the language in its first step and downloads the translation if you choose a language other than English.
2. Creating a database
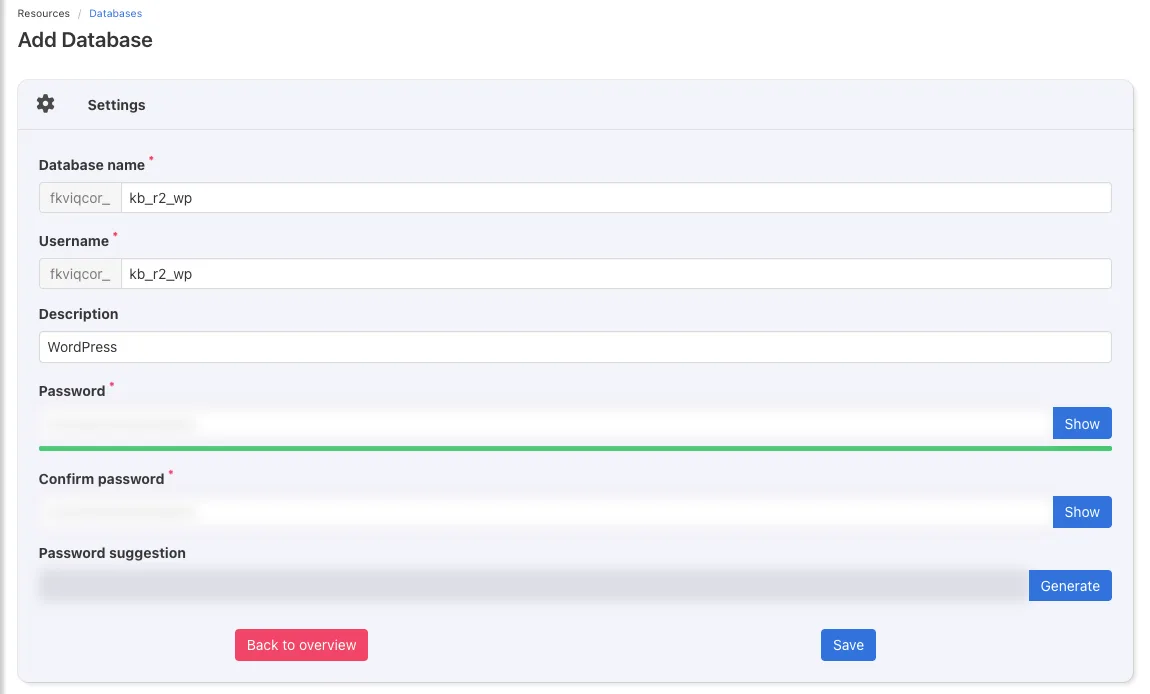
- In KeyHelp’s left-hand menu, in the RESOURCES group, click the Databases menu item, then the Add database button.
- Fill in the Database name and Username fields. KeyHelp puts your account’s system username and an underscore in front of both (
fkviqcor_in the screenshot), so the full name will be, for example,fkviqcor_kb_r2_wp. You can write a note in the Description field (for example WordPress); this is optional. - Enter a strong password in the Password and Confirm password fields. KeyHelp can also generate one with the Generate button in the Password suggestion row.
- Click the Save button.
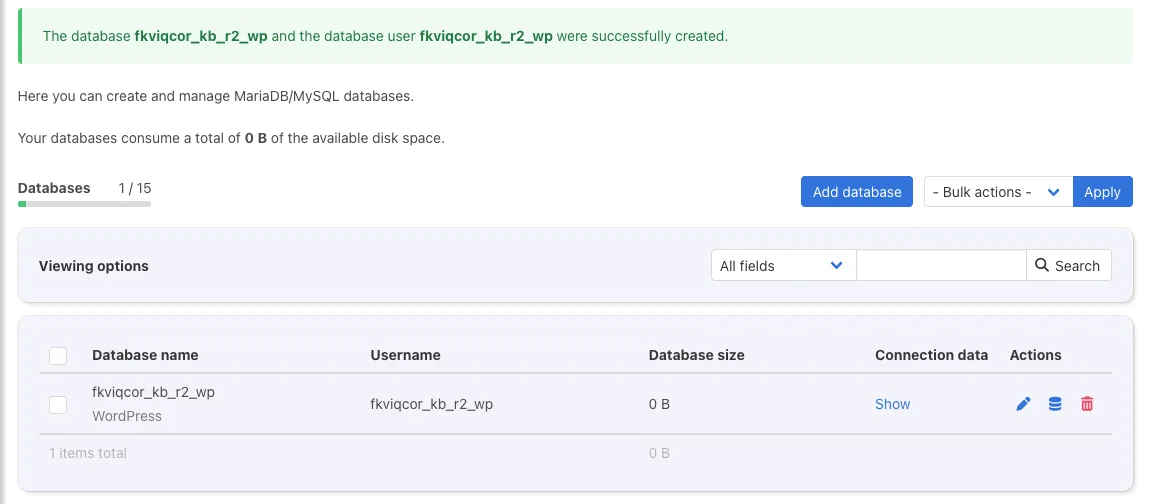
The new database appears in the list. Note down the full database name, the username and the password, as the installer asks for them. Clicking the Show link in the row’s Connection data column also shows you the host: localhost (port 3306).
3. Which folder does WordPress go into?
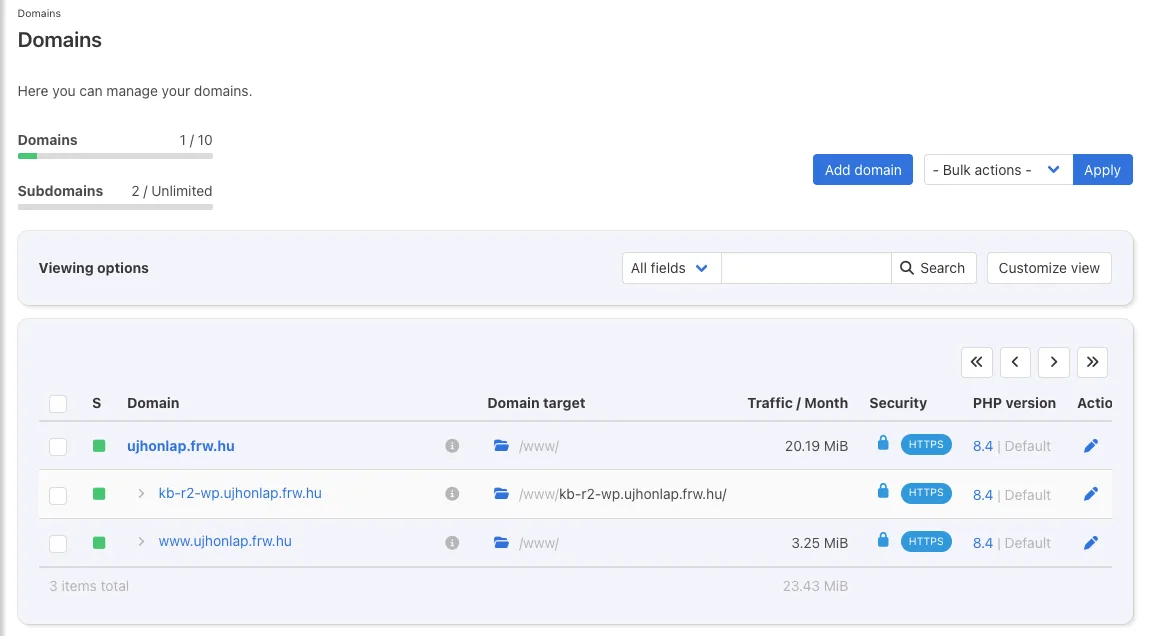
On the Domains page of the DOMAINS group, the Domain target column shows which folder a domain serves. The main domain’s folder is /www/; a newly added subdomain gets, by default, a folder under /www/ with the same name as its full name (/www/kb-r2-wp.ujhonlap.frw.hu/ in the screenshot). Clicking the folder icon in the row opens the File Manager directly in that folder.
Before installing, check whether the domain already has an SSL certificate (on the Security tab when you edit the domain, or simply open it with https:// and see whether the browser reports an error). If the certificate is in place, open the installer with https://: WordPress saves the address on which you ran the installation. If there is no certificate yet, enable it: Enabling a free Let’s Encrypt certificate on your web hosting account.
4. Uploading the files
Using FTP
Extract the downloaded ZIP file on your computer, connect to the hosting with an FTP program (for example FileZilla), and upload the contents of the wordpress folder into the domain’s folder: not the wordpress folder itself, only the files and folders inside it. Delete the old files in the folder (especially index.html) first.
Using the File Manager
-
Delete the files in the folder. KeyHelp puts a placeholder page into the folder of a new domain (an
index.htmland a CSS file:style.min.cssfor a subdomain,bulma.min.cssfor the main domain). You need to delete them, becauseindex.htmltakes precedence over WordPress’sindex.php. Tick the checkboxes in front of the files, select Delete selection in the Bulk actions list and click the Apply button.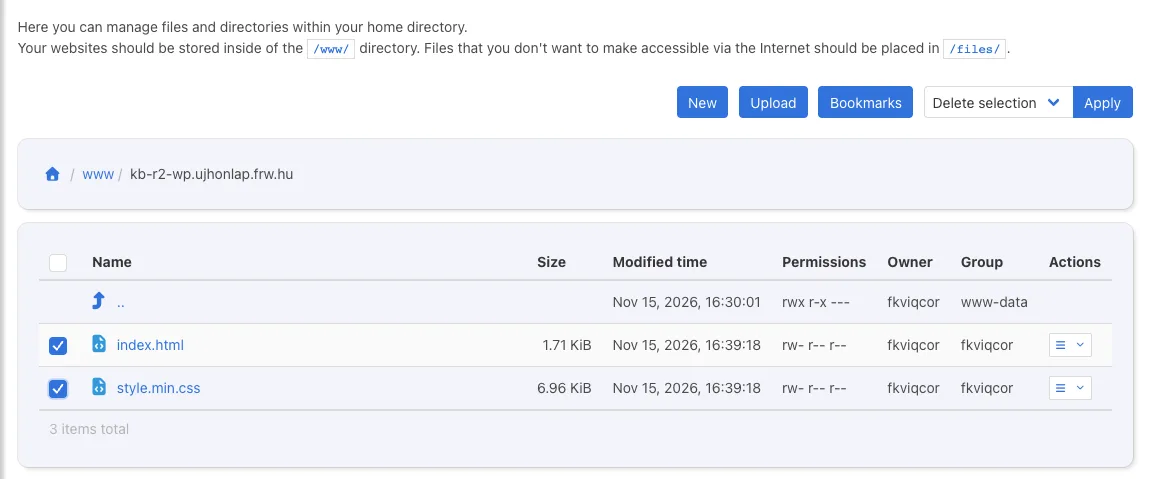
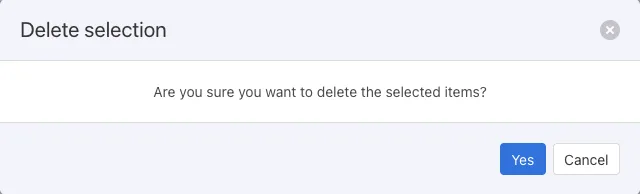
In the confirmation window, click the Yes button.
-
Upload the ZIP file. Click the Upload button. On the From local storage tab of the window, use the Choose file button to select the downloaded ZIP file, then click the Upload button. A single file can be at most 128 MiB; depending on your internet connection, the upload may take a minute or two.
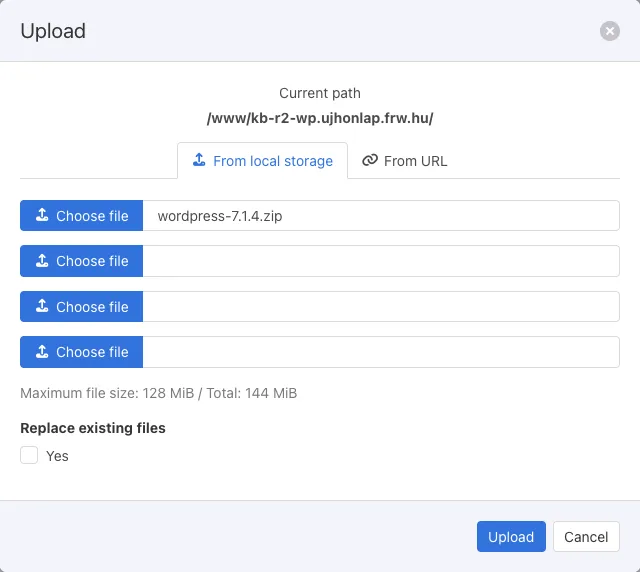
You don’t even need to download the package to your computer: on the From URL tab, enter
https://wordpress.org/latest.zipin the URL field and click the Upload button. The server downloads the ZIP file into the folder itself, under the name with the version number (for examplewordpress-7.1.4.zip); you can leave the File name field empty. -
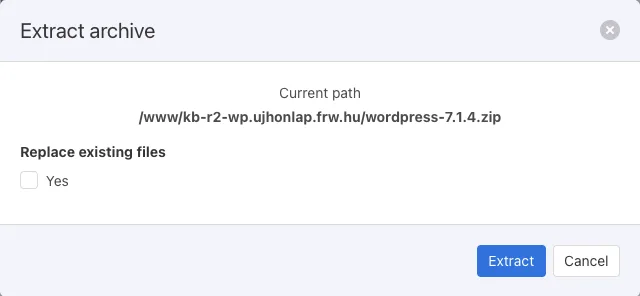
Extract the ZIP file. In the file’s row, click the menu button in the Actions column and choose Extract archive (or click the name of the ZIP file).
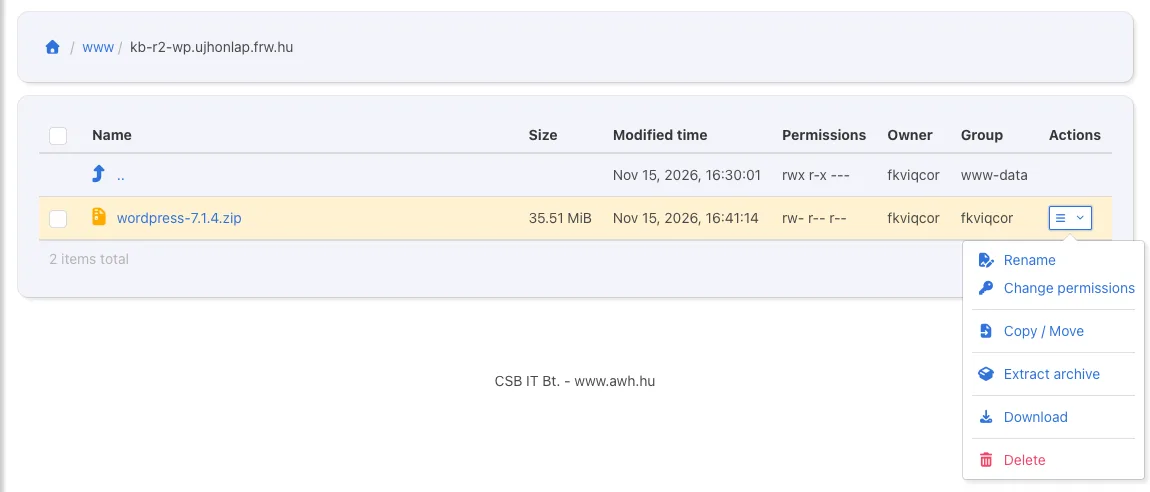
In the Extract archive window, click the Extract button.
-
Delete the ZIP file. After extraction, a
wordpressfolder appears. You no longer need the ZIP file: in the menu of its row, choose Delete, then the Yes button.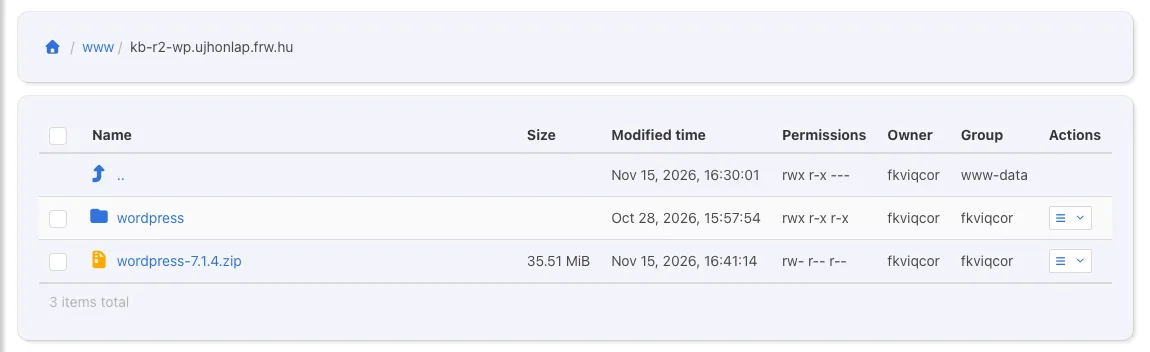
-
Move the files into the domain’s folder. Go into the
wordpressfolder and select all files and folders with the checkbox in the header. Select Copy / Move in the Bulk actions list and click the Apply button. In the window, set File operation to Move and Target directory to the domain’s folder (you can also select it by clicking the folder’s name in the list below), then click the Okay button.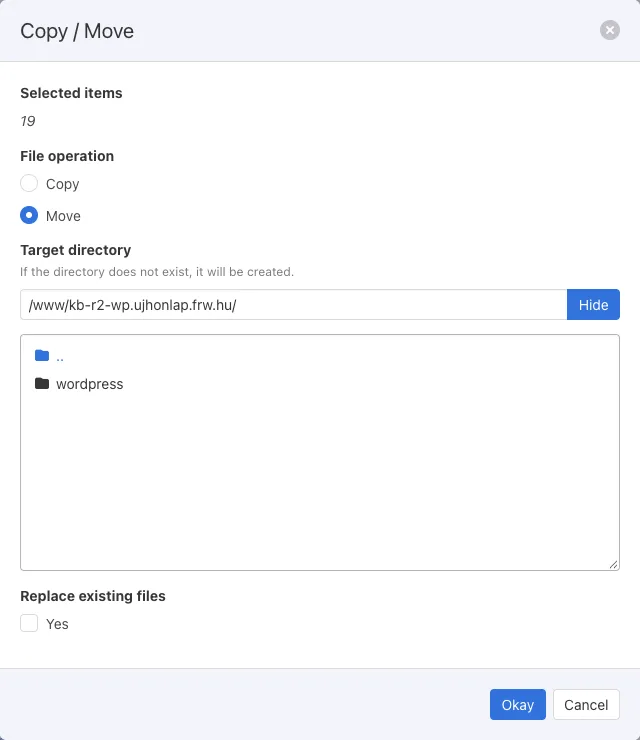
-
Delete the empty
wordpressfolder. Go back up one level, tick thewordpressfolder and delete it with the Delete selection action. The domain’s folder now contains the WordPress files.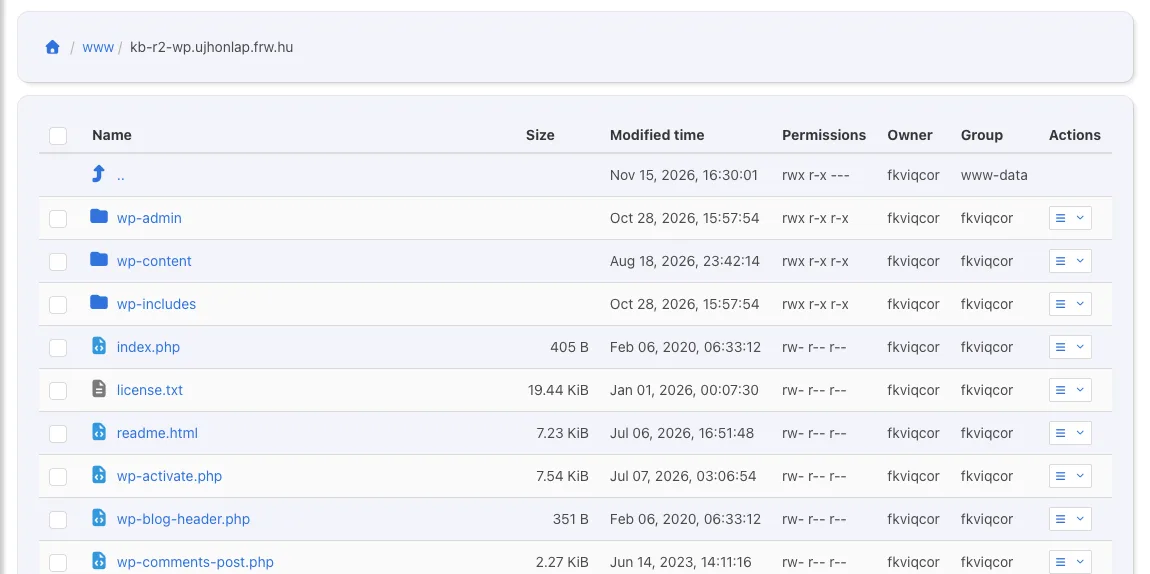
5. The WordPress installer
-
Open the domain in your browser (
https://). On its first page, the installer asks for the language (Select a default language): choose your language, for example English (United States), and click the Continue button.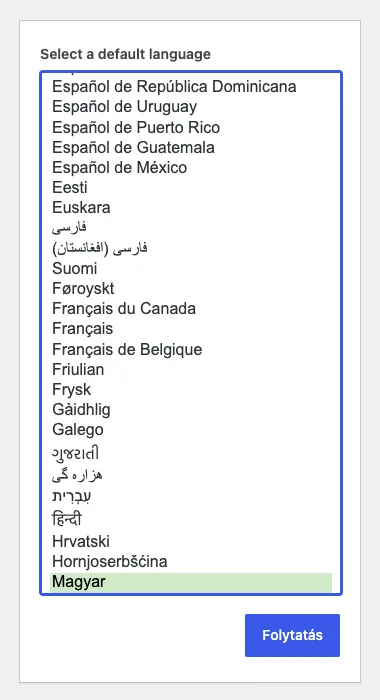
- The Before getting started page lists the information you will need. Click the Let’s go! button.
-
Enter the database details: Database Name, Username, Password (the ones you created in step 2, including the account name prefix); leave Database Host as
localhost, and Table Prefix can staywp_. Click the Submit button. The installer uses these to create thewp-config.phpfile.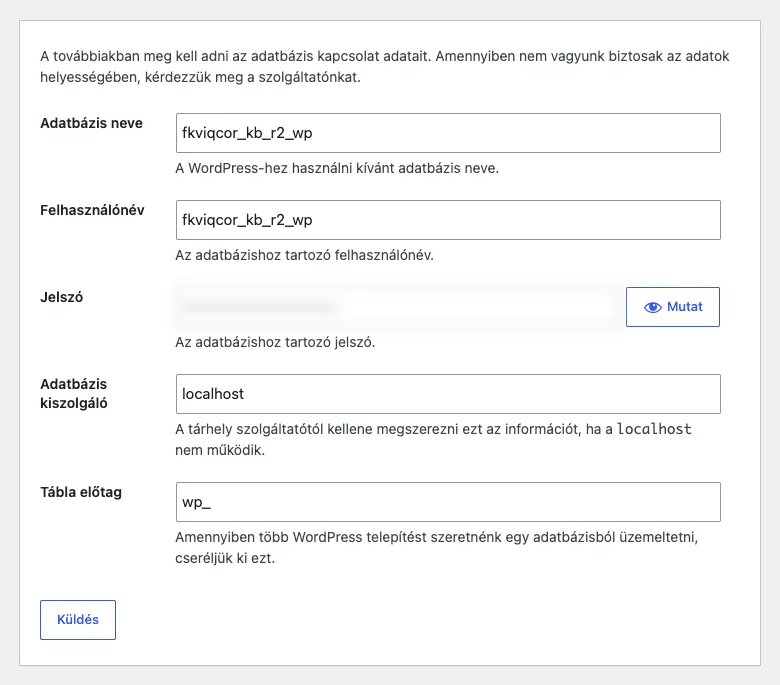
- On the Successful database connection page, click the Run the installation button.
-
On the Welcome page, fill in the Site Title (the name of the website), Username, Password and Your Email fields (this is your administrator account; don’t call it
admin), then click the Install WordPress button.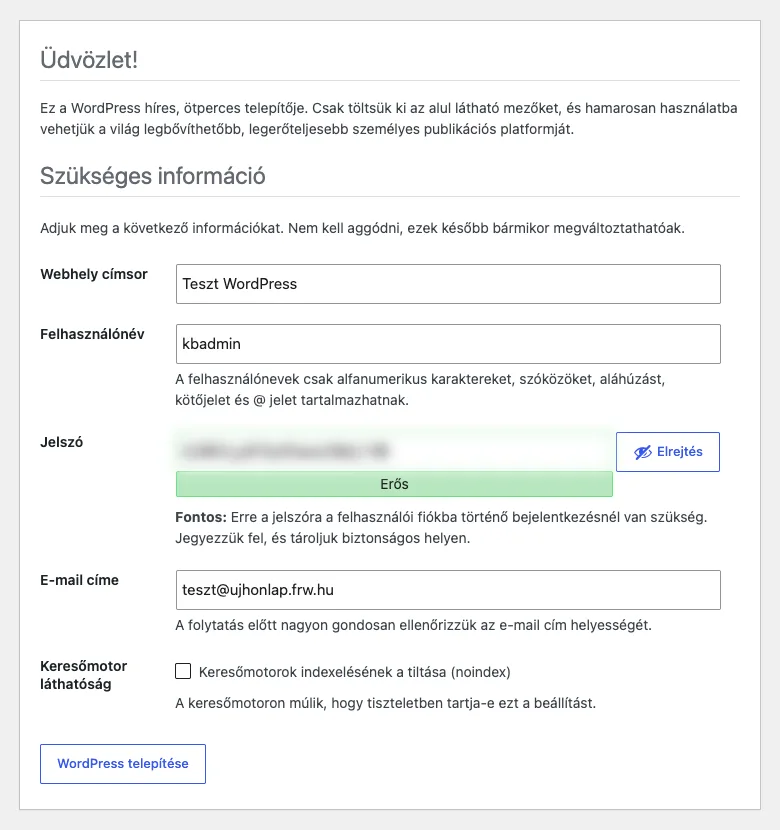
- On the Success! page, the Log In button takes you to the dashboard (
/wp-admin/).
Common errors
“Error establishing a database connection”. The database name, the username or the password is wrong. Don’t forget the account name prefix and the underscore at the beginning of the names; you can see the exact names in the Databases list.
The domain shows KeyHelp’s placeholder page or an old site. The index.html is still in the folder, or you uploaded the files into the wrong folder; check the Domain target column on the Domains page.
The files stayed in a wordpress subfolder. In this case, WordPress is only available at https://pelda.hu/wordpress/. Move the files up one level (part 4, step 5), and only then run the installer.
